Why Our RV Water Pump Failed (And How We Fixed It)
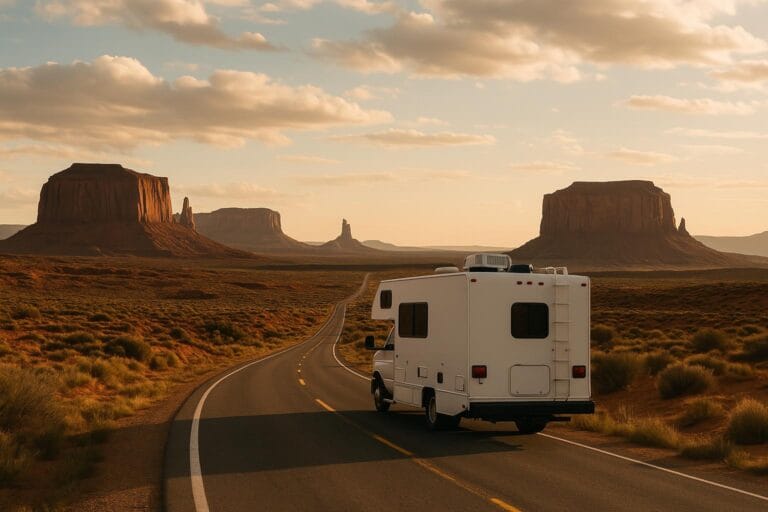
Last month, we were parked at a gorgeous spot outside Moab when Gram turned on the faucet and heard that grinding noise every RVer dreads. Our RV water pump was failing, and we were about to learn a hard lesson about paying attention to warning signs. If you’re on the road long enough, you’ll face this too – so let me share what we discovered about diagnosing and fixing water pump problems when you’re miles from the nearest RV shop.
The good news? Most water pump issues are fixable with basic tools and a little patience. The bad news? We ignored some pretty obvious warning signs that could’ve saved us from a complete failure.
The Warning Signs We Missed (Don’t Make Our Mistakes)
Looking back, our RV water pump had been trying to tell us something for weeks. Here’s what we should have paid attention to:
The Cycling Problem: About three weeks before the big failure, our pump started short-cycling. Instead of running for 10-15 seconds when we turned on a faucet, it would kick on and off every few seconds. I thought it was just the accumulator tank acting up and honestly didn’t want to deal with it during our busy travel season.
Pressure Drop: Gram mentioned the water pressure felt weak in the shower, but we chalked it up to the campground’s water pressure issues. Wrong move. When you’re running on your own pump system, pressure drops usually mean trouble.
Strange Noises: The pump had developed a slight whining sound that gradually got louder. We just turned up the radio. Classic mistake number three.
Higher Amp Draw: I noticed our battery monitor showing higher than normal power consumption, but figured it was the fridge working harder in the heat. If you’ve got a good boondocking setup, you’re probably monitoring your power usage closely enough to catch this early warning sign.
The Day Our RV Water Pump Finally Gave Up
It was day two of a four-day stay in a remote Utah campground. Gram went to make coffee (priorities, right?) and instead of the usual smooth hum, we heard grinding, squealing, and then… silence. The pump had seized completely.
Here’s where things got interesting. We were 45 minutes from the nearest town with an auto parts store, and the closest RV dealer was two hours away. This is exactly the kind of situation you need to be prepared for when you’re living the RV life full-time.
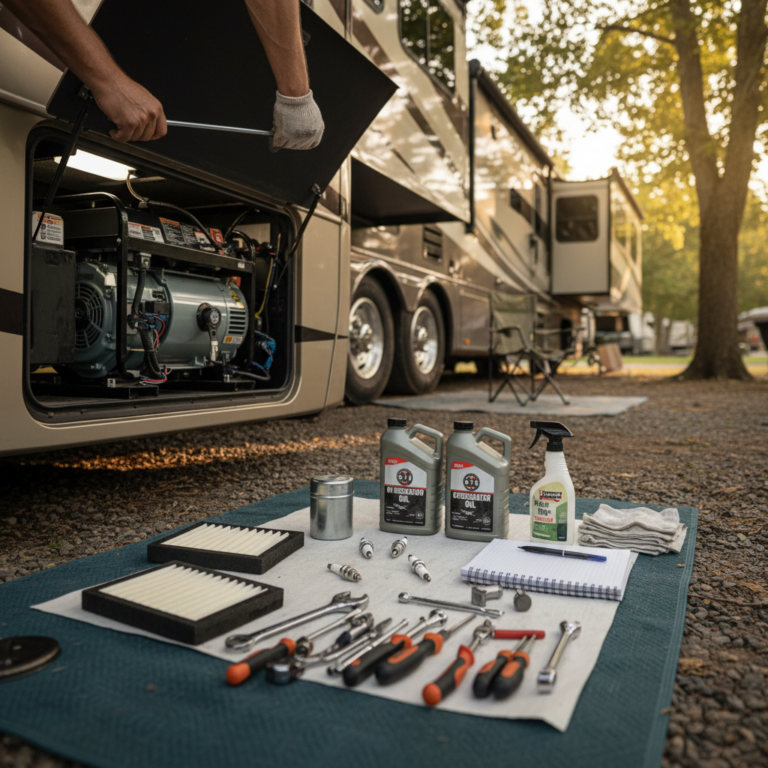
First step was diagnosing the problem. I grabbed my multimeter and basic tools – having the right equipment matters, and if you’re serious about RV travel, invest in quality tools and essentials that’ll serve you well on the road.
Quick Diagnosis Steps
Before assuming the worst, run through these checks:
Check the Fuse: Sounds obvious, but pumps can blow fuses when they’re working too hard. Ours was fine, but always start with the simple stuff.
Verify Power: Use a multimeter to confirm 12V power at the pump connections. No power usually means wiring issues or a bad pressure switch.
Listen Carefully: A humming pump that’s not moving water often has a seized impeller. Grinding noises typically mean bearing failure. Complete silence with power present usually means the motor’s gone.
In our case, the pump had power but was making awful grinding noises when it tried to start. Classic bearing failure combined with a seized impeller.
Our Step-by-Step RV Water Pump Repair Process
With limited options and no desire to cut our trip short, we decided to tackle the repair ourselves. Here’s exactly how we did it:
Gathering Supplies
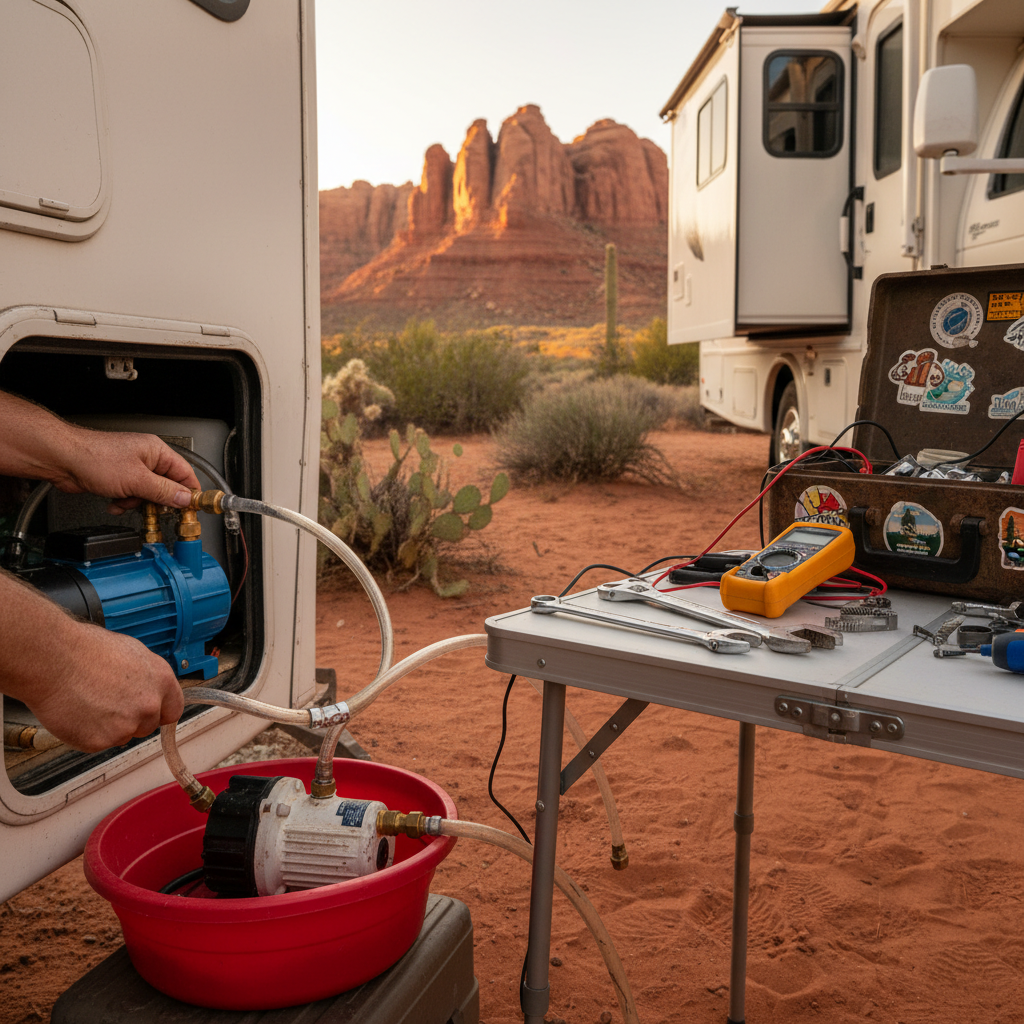
The nearest town had a NAPA auto parts store, and surprisingly, they had a compatible water pump in stock. Not the exact model, but close enough specs to work. I also picked up basic plumbing fittings, Teflon tape, and some extra wire nuts just in case.
Total cost: $120 for the pump, $15 for fittings and supplies. Compare that to the $300+ an RV shop would charge for parts and labor.
The Actual Installation
Step 1: Turn off the water pump breaker and drain the system. We opened all faucets and the low-point drains to get as much water out as possible.
Step 2: Disconnect the old pump. This involved unplugging the electrical connection and carefully removing the water lines. Pro tip: take photos before disconnecting anything – you’ll thank yourself later.
Step 3: The new pump had slightly different mounting holes, so I had to get creative with the installation. A few extra screws and some careful positioning got it secured properly.
Step 4: Reconnecting the water lines was straightforward, but make sure you use proper fittings and plenty of Teflon tape. Leaks in your RV are no joke.
Step 5: Wiring was simple – just match positive to positive and negative to negative. The pressure switch wires connected to the same terminals.
The whole job took about two hours, including a trip to town for parts. Not bad for roadside repairs.
Testing and Troubleshooting the New Installation
Getting the new RV water pump installed was just the beginning. Here’s how we tested everything:
Initial Power-Up: With water lines reconnected but before pressurizing the system, we turned on the pump briefly to make sure it ran smoothly. Good sign – no grinding noises.
System Fill: We slowly filled the fresh water tank and opened faucets one at a time to purge air from the lines. This process took about 20 minutes and used roughly 10 gallons of water.
Pressure Testing: The real test came when we closed all faucets and watched the pressure gauge. The pump should cycle on, build pressure, then shut off automatically. Ours worked perfectly.
Flow Testing: Finally, we tested each faucet and the shower for proper pressure and flow. Everything worked better than it had in months.
Common Issues During Installation
Even with everything going smoothly, we encountered a couple hiccups:
The pressure switch took some adjustment to get the right cut-in and cut-out pressures. Most pumps want to start around 20 PSI and stop around 45 PSI, but every system’s different.
We also had some minor vibration noise that required adding rubber mounting pads. A $5 fix that made a huge difference in comfort.
Emergency Backup Options When You’re Stuck
What if you can’t find parts or the repair goes sideways? Here are the backup plans every RVer should know about:
Gravity-Fed System
If you’ve got a roof-mounted fresh water fill, you can create a temporary gravity-fed system. Not ideal, but it’ll keep you going until you reach a proper repair facility. We learned this trick from another couple during our Rail-and-Road Reset adventure.
Manual Water Jugs
Keep a couple of 5-gallon water jugs as backup. You can gravity-feed them through your city water connection with a simple adapter. Not convenient, but functional.
Campground Water Hookups
Obviously, staying at campgrounds with full hookups eliminates the pump problem entirely. But that’s not always possible when you’re exploring remote areas or boondocking on a budget.
Portable Water Pumps
Some RVers carry small 12V utility pumps as emergency backups. They’re not designed for continuous duty, but they’ll get you by for a few days.
Preventive Maintenance We Should Have Done
Here’s the truth – most RV water pump failures are preventable with basic maintenance. After this experience, we’ve implemented a much better routine:
Monthly Inspection: Check for unusual noises, vibration, or pressure issues. Address problems early instead of ignoring them like we did.
Winterization: Properly winterizing your water system prevents freeze damage, which is a major cause of pump failure. Even if you’re heading south for winter, do it right.
Filter Maintenance: Clogged water filters make pumps work harder and fail sooner. We now change ours every 2-3 months instead of waiting until they’re obviously dirty.
Pressure Tank Service: The accumulator tank needs occasional attention too. Check the air pressure annually and replace it if it’s not holding pressure properly.
Tools and Spares to Carry
Based on this experience, here’s what we now keep in our mobile toolkit:
Basic multimeter for electrical troubleshooting, assorted water line fittings and clamps, Teflon tape and pipe sealant, spare fuses for the pump circuit, and a basic water pump (the cheap insurance policy we wish we’d had).
If you’re just getting started with RV life and wondering about budgeting for repairs and maintenance, check out our 4-week budget-smart plan for new RV buyers. Emergency repairs are part of the reality, so plan for them financially.
What We Learned About RV Water Pump Reliability
After talking to other RVers and doing some research, here’s what we discovered about water pump longevity:
Quality Matters: Cheap pumps fail more often and usually at the worst times. Spend a little more upfront for a name-brand pump with good reviews.
Installation Counts: Proper mounting, wiring, and plumbing significantly affect pump life. Vibration kills pumps faster than anything else.
Usage Patterns: Pumps that cycle frequently (like ours was doing) wear out faster. Fix pressure leaks and switch problems quickly.
Environment: Extreme temperatures, dust, and moisture all affect pump reliability. Keep your water bay clean and well-ventilated.
The pump we installed as a replacement has been running flawlessly for six months now. We’re treating it better, maintaining it properly, and paying attention to warning signs.
Cost Analysis: DIY vs. Professional Repair
Our DIY repair cost $135 total and took half a day. A mobile RV service would’ve charged $400-500 and taken 2-3 days to get to us. An RV dealership would’ve been $300+ just for parts and labor, plus the hassle of getting there.
The savings paid for several nights of camping, and we learned skills we’ll use again. That’s the RV lifestyle working in our favor.
Moving Forward: Better Prepared
This RV water pump failure taught us valuable lessons about preventive maintenance, emergency preparedness, and the importance of addressing problems early. We’re now part of that group of RVers who actually knows how their systems work.
The experience also reinforced why we love this lifestyle. Yeah, things break and you have to fix them. But there’s something satisfying about solving problems on the road and becoming more self-sufficient. It’s all part of the adventure.
If you’re considering RV life or just getting started, don’t let repair stories scare you off. With basic tools, some patience, and willingness to learn, most problems are manageable. The key is being prepared and not ignoring warning signs like we did.
For those still in the planning stages, our Find Your RV Fit guide covers maintenance considerations along with all the other factors that go into choosing the right rig for your adventures.
Next time you hear your water pump making unusual noises, don’t just turn up the radio. Address it early, carry basic spares, and remember – every breakdown is just another story to share around the campfire.