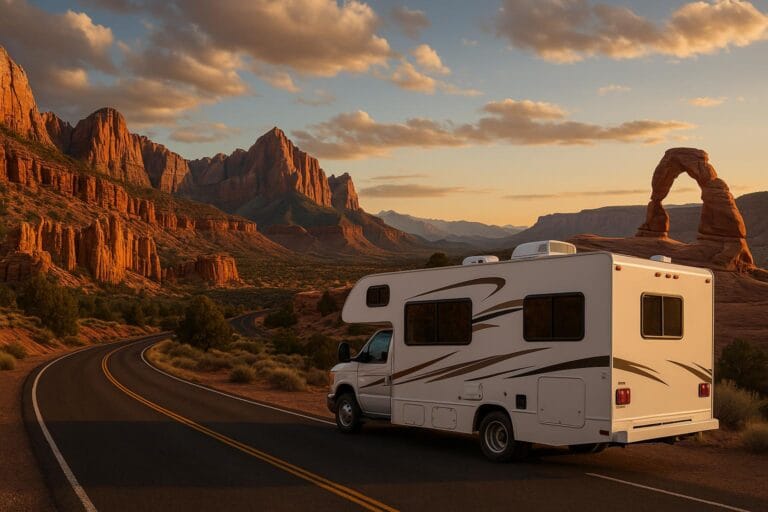
RV Basement Storage: Maximize Space Like a Pro
Let me tell you about the time we spent forty-five minutes unpacking half our basement compartment just to find a single camping chair buried underneath everything else. That’s when Sarah looked at me and said, “There’s got to be a better way to organize our RV basement storage.” She was absolutely right, and after years of trial and error, we’ve finally cracked the code on maximizing every cubic inch while keeping everything accessible.
If you’ve ever played Tetris with your storage bays or wondered why you can never find what you need when you need it, this post is for you. We’re sharing our hard-learned system that transformed our chaotic compartments into organized, efficient storage that actually works on the road.
The Reality Check: Why Most RVers Get Basement Storage Wrong
Here’s the thing – most of us approach RV basement storage like we’re packing a moving truck. We stuff things in wherever they fit, thinking we’ll remember where everything is. Spoiler alert: we don’t.
The first mistake we made was ignoring weight distribution. We’d load our heaviest gear in the back corner of one bay, creating an unbalanced rig that swayed more than it should. Not exactly confidence-inspiring when you’re navigating mountain passes.
Second mistake? Treating every storage bay like a bottomless pit. We’d stack things floor to ceiling without any organization system. Want that camp table? Better hope it’s not under the cooler, toolbox, and three tubs of miscellaneous gear.
Third mistake was weatherproofing. Or rather, not weatherproofing properly. After our first major rainstorm, we discovered that “weatherproof” compartments aren’t always as weatherproof as we’d hoped. Lesson learned the soggy way.
Weight Distribution: The Foundation of Smart Storage
Before you start organizing anything, you need to understand weight distribution basics. This isn’t just about staying within your RV’s weight limits – it’s about creating a stable, safe ride.
Heavy items should go low and toward the center of your rig. Think of your RV like a seesaw. You want the weight balanced between front and rear, left and right. We keep our generator, spare parts, and tools in the center compartments, distributed evenly on both sides.
Here’s a practical tip: use a bathroom scale to weigh items before storing them. Anything over 30 pounds gets special consideration for placement. Your water hose, awning accessories, and camp chairs can go in the outer compartments since they’re lighter.
Also, consider how weight affects your slides and stabilizers. We learned this during a particularly windy night when our poorly distributed weight made our slide-out room rock more than usual. If you’re dealing with slide maintenance issues, check out our guide on RV slide-out maintenance for more tips.
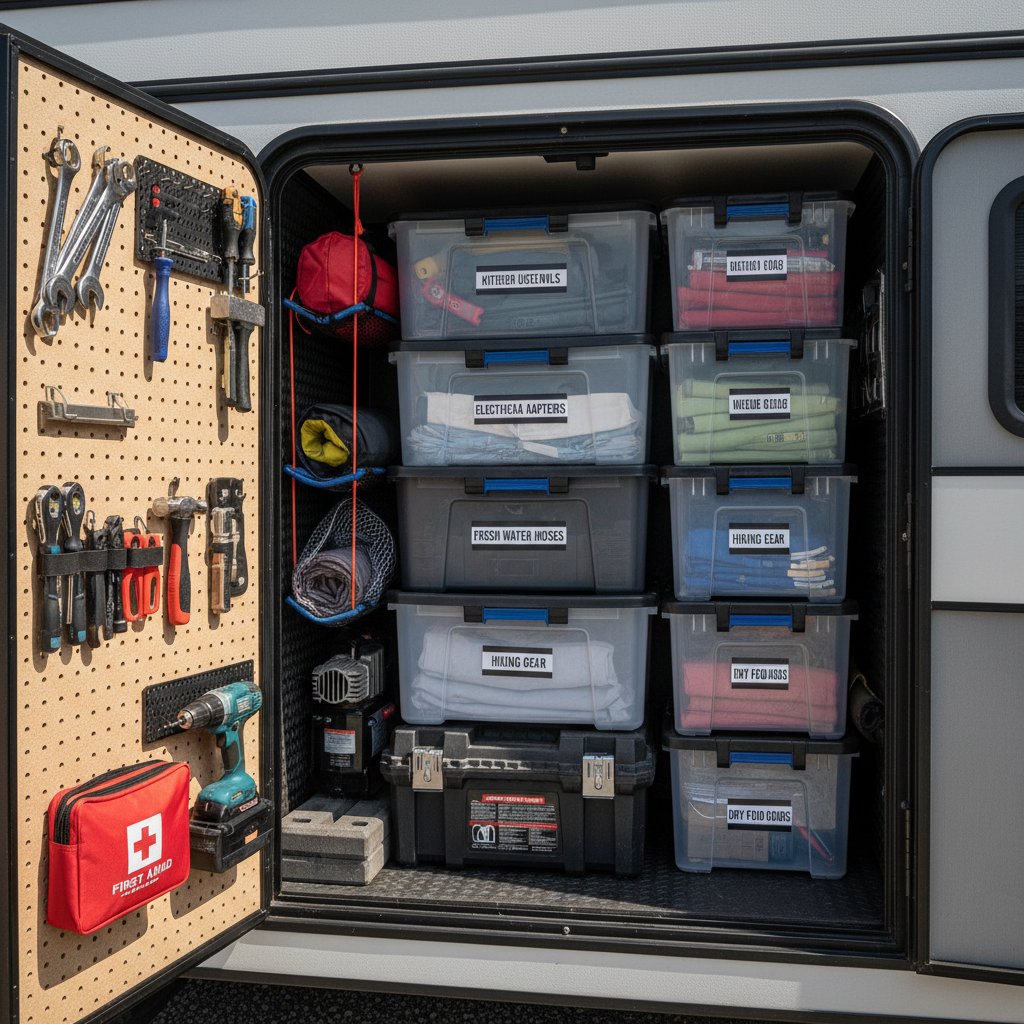
The Zone System: Organizing RV Basement Storage by Function
After years of random stuffing, we developed what we call the “zone system.” Each compartment gets assigned a specific function, and everything in that zone serves the same purpose.
Zone 1: Setup and Breakdown
This is your first-in, last-out compartment. Leveling blocks, wheel chocks, electrical adapters, water hoses, and sewer equipment. Everything you need to set up or break down camp goes here. Keep it easily accessible – usually the compartment closest to your entry door.
Zone 2: Recreation and Outdoor Living
Camp chairs, outdoor rugs, games, sports equipment, and anything else that makes camp life fun. This zone can be further from your entry since you’re not accessing it every time you move.
Zone 3: Maintenance and Emergency
Tools, spare parts, emergency supplies, and anything you hope you’ll never need but absolutely must have. This can go in less convenient spots since you’re accessing it less frequently.
Zone 4: Seasonal and Long-term Storage
Winter gear in summer, summer gear in winter, extra supplies, and items you only use occasionally. These get the deepest, least accessible spots.
Weatherproofing: Protecting Your Gear from the Elements
Even the best RV compartments can leak. We learned this the hard way during a week-long rain in Oregon. Everything we thought was safe got damp, and some items were ruined completely.
Now, everything goes in waterproof containers. We use different sizes of sealed storage tubs – clear ones so we can see what’s inside without opening them. For irregularly shaped items, we use heavy-duty storage bags with zip seals.
Here’s our weatherproofing hierarchy:
- Electronics and anything with fabric: Hard waterproof cases
- Tools and metal items: Sealed tubs with desiccant packs
- Camping gear: Waterproof storage bags
- Items that can handle moisture: Loose in compartment
Pro tip: Include a moisture absorber in each compartment. Those little desiccant packs from shoe boxes work great, or you can buy larger versions designed for storage areas.
The Accessibility System: Finding What You Need Fast
The best organization system in the world doesn’t help if you can’t find what you need. We developed what we call the “accessibility ladder” – the more often you use something, the easier it should be to reach.
Items we use every time we move camp go in the front of compartments, at eye level. Items we use weekly go behind those, still easily reachable. Monthly items go deeper or higher. Seasonal items get the back corners.
We also use clear storage containers wherever possible. Being able to see what’s in a container without opening it saves tons of time. For opaque containers, we use a label maker – and I mean everything gets labeled. Trust me, after a long driving day, you don’t want to play guessing games with unmarked boxes.
Another game-changer: create a simple inventory list on your phone. We use a notes app with sections for each storage bay. When we’re looking for something specific, we can check the list instead of randomly opening compartments.
Maximizing Vertical Space: Think Like a Warehouse
Most RV compartments are taller than they are wide or deep, but many RVers only use the bottom half of that space effectively. Think vertically, like warehouse storage.
We use stackable storage containers that maximize the full height of each compartment. The key is finding containers that stack securely – you don’t want things sliding around while driving.
For awkward spaces, adjustable shelving works wonders. We installed simple wire shelving in our larger compartments, doubling our usable storage area. Just make sure anything on shelves is secured – bungee cords become your best friend.
Vertical dividers also help corral loose items. Pool noodles cut to size make great, cheap dividers that won’t damage your gear if things shift during travel.
Smart Storage Solutions That Actually Work
Over the years, we’ve tried countless storage gadgets. Most were gimmicky junk, but a few genuine game-changers emerged from our testing.
Modular storage cubes let you customize your space as needs change. They’re like building blocks for adults – you can reconfigure them based on what you’re carrying for each trip.
Compression sacks work miracles for bulky items like sleeping bags, extra bedding, or winter clothes. They can reduce storage volume by 60% or more.
Magnetic tool strips mounted inside compartment doors utilize dead space while keeping small metal items organized and visible. We use these for screwdrivers, pliers, and other small tools.
Shoe organizers aren’t just for shoes. Hang them inside compartment doors for small items like electrical adapters, spare fuses, or cleaning supplies. Each pocket becomes a designated spot for specific items.
The Loading Strategy: Order Matters
How you load your compartments affects everything – weight distribution, accessibility, and organization maintenance. We learned this through many mistakes, including the infamous “camping chair incident” I mentioned earlier.
Load heavy items first, positioned low and toward the center of your rig. Then build around them with lighter items, always keeping frequently used gear accessible.
Create “walls” of stable items, then fill gaps with smaller gear. This prevents everything from shifting during travel – nothing’s worse than opening a compartment to find your carefully organized system has become chaos soup.
Leave pathways to reach items in the back. Don’t pack solid from front to back unless everything in that stack gets used together. Otherwise, you’ll be unpacking half the compartment to reach one item.
Maintenance Mode: Keeping Your System Working
Even the best organization system falls apart without maintenance. We learned this during our cross-country trip when three weeks of “just tossing things in” destroyed months of careful organization.
Set a weekly organization check. Every Sunday, we spend 15 minutes putting things back where they belong. It’s like making your bed – a small effort that keeps everything functioning smoothly.
Take photos of your ideal organization setup. When things get messy (and they will), you have a reference for how everything should look. This is especially helpful if your travel partner does the reorganizing while you’re handling other setup tasks.
Regular purging is essential too. Every few months, we go through each compartment and ask, “Have we used this?” If the answer is no for several months, it might be time to find it a new home or donate it.
Special Considerations for Different RV Types
Not all RVs are created equal when it comes to basement storage. Motorhomes typically have more and larger compartments than travel trailers, while truck campers have the least storage space.
If you’re still in the rig-shopping phase, storage configuration should be a major factor in your decision. We cover this in detail in our 4-week budget-smart plan to buy your first RV.
For smaller rigs with limited basement storage, every inch counts even more. Focus on multi-use items and compression storage. Vacuum storage bags become essential, not just helpful.
Larger rigs present their own challenges – it’s easy to let abundant storage become disorganized storage. The zone system becomes even more important when you have multiple large compartments.
Real-World Testing: What Works on the Road
The ultimate test of any storage system is how it performs after 500 miles of highway driving. We’ve learned that what looks perfect in the driveway might be chaos after a day of mountain curves.
Everything needs to be secured for travel. Bungee cords, cargo nets, and friction mats become essential tools. Items that can roll or slide need special attention – we use foam padding or towels to prevent movement.
Weight shifts are inevitable, but good organization minimizes their impact. When heavy items are properly positioned and secured, minor shifts don’t cascade into complete disorganization.
Climate changes affect storage too. What worked in dry Arizona might not work in humid Florida. Moisture management becomes crucial in different environments, which is why those desiccant packs we mentioned are so important.
Common Mistakes and How to Avoid Them
We’ve made every storage mistake in the book, so you don’t have to. Here are the big ones to avoid:
Don’t ignore manufacturer weight limits for individual compartments. Just because space exists doesn’t mean it can handle unlimited weight. Check your manual for compartment-specific limits.
Don’t store food in basement compartments unless it’s in truly sealed containers. We learned this lesson courtesy of some very determined ants in New Mexico.
Don’t forget about temperature extremes. Basement compartments can get incredibly hot in summer sun or freezing in winter weather. Some items don’t handle these extremes well.
Don’t rely solely on manufacturer door seals. They’re good, but they’re not perfect. Always have backup weatherproofing for anything that can’t handle moisture.
Making It Work for Your Travel Style
Your storage system should match how you actually use your RV. Weekend warriors need different organization than full-timers. Boondockers need different setups than campground hoppers.
If you’re primarily boondocking, you might want to check out our boondocking on a budget guide for gear-specific storage tips.
Frequent movers need everything secured for travel and easily accessible for setup. Long-term parkers can optimize for storage density over accessibility.
The key is being honest about your travel patterns and organizing accordingly. Don’t organize for the trip you wish you were taking – organize for the trips you actually take.
After years of stuffing, reorganizing, and occasionally losing our minds trying to find essential gear, we’ve finally got a basement storage system that works. It’s not perfect – no system ever is – but it’s functional, accessible, and survives the reality of life on the road.
The real secret isn’t any specific product or technique. It’s developing a system that works for your rig, your gear, and your travel style, then maintaining it consistently. Start with the basics – weight distribution, weatherproofing, and zones – then refine as you learn what works for your specific situation.
Remember, the best storage system is the one you’ll actually use. Keep it simple, keep it consistent, and keep refining. Your future self will thank you the next time you need that camping chair and can find it in under two minutes.