RV Internet Setup: Stay Connected Without Breaking the Bank
When we first hit the road three years ago, I thought our RV internet setup would be simple. Boy, was I wrong. After burning through data allowances faster than propane on a cold morning and dealing with more dropped video calls than I care to remember, we’ve finally cracked the code on reliable RV internet setup that won’t leave you choosing between staying connected and eating.
Let me share what we’ve learned from testing everything from signal boosters to Starlink, plus the real costs nobody talks about upfront.
The Reality Check: What RV Internet Actually Costs
Here’s the thing about RV internet setup – the sticker price is just the beginning. After three years of trial and error, we’ve spent close to $2,400 on various solutions. That includes two failed boosters, three different hotspot plans, and enough data overage fees to make your accountant cry.
The monthly costs add up fast. Most couples we meet on the road are running $150-300 per month for internet alone. That’s before you factor in equipment costs, which can range from $200 for a basic setup to over $2,500 for premium solutions like Starlink.
But here’s what’s encouraging – once you find what works for your travel style, those costs stabilize. We’re now running about $180 monthly for a setup that handles everything from checking email to video calls with the grandkids.
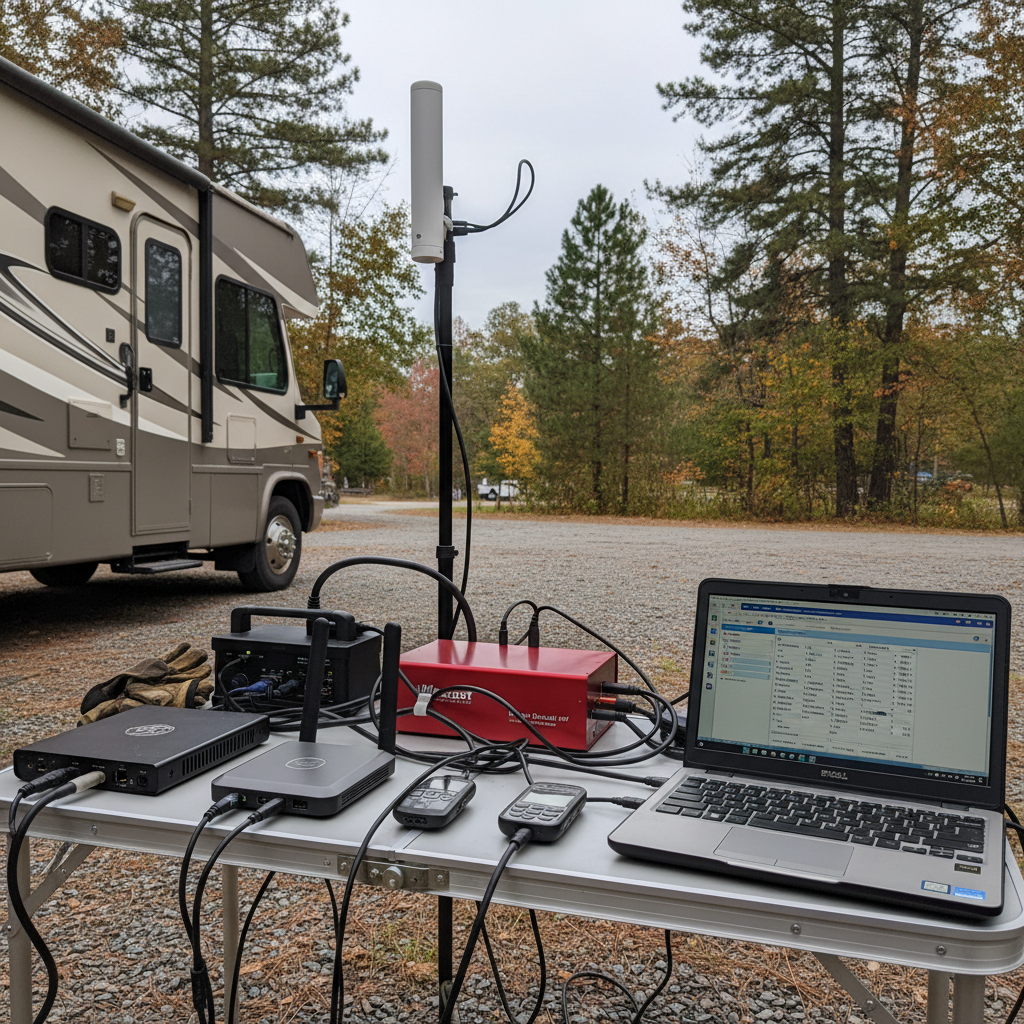
Our Current RV Internet Setup That Actually Works
After all that testing, here’s our battle-tested configuration. We run a dual-carrier approach using Verizon and AT&T hotspots, backed up by a WeBoost signal booster. This redundancy saved our bacon more times than I can count, especially during our rail-and-road reset adventure through spotty coverage areas.
The Verizon hotspot handles our heavy lifting – video streaming and work calls. The AT&T device serves as backup and handles lighter tasks. The WeBoost booster isn’t magic, but it consistently gives us 1-2 bars of improvement, which often means the difference between usable internet and frustration.
Total monthly cost: $165. Setup cost: $480. The peace of mind? Priceless when you’re trying to join a family video call from a campground in rural Montana.
Signal Boosters: The Truth About What They Actually Do
Let’s talk signal boosters straight up. They’re not going to turn zero bars into five bars of blazing internet. What they will do is take a weak but existing signal and make it usable.
We’ve tried three different boosters. The cheap $89 Amazon special was basically expensive decoration. The mid-range $250 option worked sometimes. Our current WeBoost (around $400) consistently delivers that crucial 1-2 bar improvement.
The key is managing expectations. In areas with absolutely no signal, boosters won’t help. But in those frustrating spots where you have one flickering bar that won’t hold a connection, a good booster can be a game-changer.
Installation took us about four hours, including mounting the external antenna and running cable. Not rocket science, but definitely a weekend project.
Hotspot Plans: Navigating the Data Maze
Hotspot plans are where carriers get creative with their marketing, and not in a good way. “Unlimited” rarely means unlimited, especially at full speeds.
Verizon’s current plan gives us 150GB at full speed, then throttles to unusable speeds. AT&T offers 100GB before throttling. T-Mobile’s rural coverage made it a non-starter for our travel style, though they’re improving.
Here’s what those data limits actually mean in real-world use:
– Checking email and light browsing: 2-3GB per month
– Video calls (like Zoom): 1GB per hour
– Streaming Netflix in HD: 3GB per hour
– Working online with file uploads: 5-10GB per day
We burned through our first month’s data in 12 days. Now we’re smarter about managing usage, and we typically use 80-120GB monthly between both devices.
Starlink: Is the Hype Worth the Price?
Starlink gets talked about like it’s the holy grail of RV internet setup. After using it for six months, here’s the unvarnished truth.
When it works, it’s fantastic. Upload and download speeds that rival home internet, low latency for video calls, and coverage in places that make other carriers weep. But – and this is a big but – it’s not the set-it-and-forget-it solution many people expect.
The dish needs a clear view of the sky. Trees, overhangs, even thick clouds can interrupt service. Setup and breakdown add 10 minutes to your arrival and departure routine. The equipment cost ($599 for the dish, $120 monthly service) puts it out of reach for many couples, especially when you’re already managing the costs covered in our 4-week budget-smart RV buying plan.
For full-time remote workers or couples who need rock-solid internet everywhere, Starlink makes sense. For most weekend warriors and casual users, the cost-benefit doesn’t quite work out.
Data Management Strategies That Save Money
Learning to manage data usage transformed our RV internet setup from a budget-buster into something sustainable. Here are our most effective strategies.
Download content during unlimited periods. Most plans offer unlimited data between midnight and 6 AM. We queue up Netflix downloads, software updates, and large file transfers during these windows.
Adjust streaming quality. Netflix at 720p uses half the data of 1080p, and honestly, the difference isn’t noticeable on most RV TVs. YouTube offers similar quality controls.
Use campground WiFi strategically. It’s usually terrible for video calls but fine for email and light browsing. Save your hotspot data for when you really need it.
Monitor usage obsessively your first few months. Both carriers offer apps that track usage in near real-time. We check ours daily until we developed better habits.
Video Calls vs. Basic Internet: Know Your Needs
Not all internet needs are created equal, and your RV internet setup should match your actual usage patterns. Basic email and browsing work fine with marginal connections. Video calls are bandwidth hungry and need consistent signals.
We discovered this the hard way during a family emergency when we needed to join multiple video conferences from a remote campground. Our single-carrier setup couldn’t handle it, which pushed us toward our current dual-carrier approach.
For couples who primarily check email and browse social media, a single unlimited hotspot plan might suffice. Add video calling needs, and you’re looking at dual carriers or Starlink. Full-time remote work demands the most robust (and expensive) solutions.
Consider your real usage patterns, not your ideal ones. We thought we’d work remotely more than we actually do. Most couples we meet overestimate their internet needs and overspend accordingly.
Budget-Friendly Alternatives for Light Users
If your internet needs are modest – checking email, light social media, occasional weather updates – you don’t need to spend $200+ monthly on your RV internet setup.
Library WiFi works great for heavy downloads and video calls in most towns. Many McDonald’s, Starbucks, and truck stops offer reliable free internet. Some couples we know plan their routes around these stops.
Campground WiFi has improved dramatically in recent years. While still inconsistent, many private campgrounds now offer usable internet. It’s worth factoring into your campground selection, especially if you’re following something like our New England quiet-season RV loop.
Consider a single carrier plan with lower data limits. If you can keep usage under 30GB monthly, you can often get by with $50-75 plans instead of unlimited options.
Installation and Setup: What to Expect
Setting up your RV internet system isn’t as daunting as it might seem, but it’s definitely more involved than plugging in a router at home. Budget a full weekend for proper installation.
External antennas require roof mounting and cable runs. We learned this lesson after our first awning installation mishap – measure twice, drill once. The antenna placement affects performance significantly.
Interior equipment needs ventilation and easy access. Hotspots generate heat and benefit from airflow. We mounted ours near a vent with easy cable management.
Test everything before you need it. We always verify our setup works properly before heading to remote areas. Nothing’s worse than discovering equipment problems when you’re 50 miles from cell service.
Keep backup plans ready. Even the best RV internet setup will occasionally fail. Having alternative solutions prevents small problems from becoming major frustrations.
Real-World Performance Across Different Scenarios
After three years of testing our RV internet setup across dozens of locations, here’s what actually works where.
National parks and remote boondocking: Forget about reliable internet. Even Starlink struggles in many locations due to terrain and tree coverage. Plan accordingly and embrace the digital detox.
Private campgrounds: Generally good for basic internet, hit-or-miss for video calls. Our dual-carrier setup shines here, giving us options when one carrier struggles.
State parks: Highly variable. Some offer excellent coverage, others are digital dead zones. Research specific locations or have backup plans ready.
Urban and suburban areas: Everything works well. You’ll have multiple carrier options and strong signals. This is where you can catch up on data-heavy tasks.
The key lesson? Flexibility beats any single solution. Our most successful internet strategy adapts to location rather than fighting it.
Getting your RV internet setup right takes time, money, and patience. But once you find your sweet spot between connectivity and budget, it transforms your travel experience. You’ll stay connected with family, handle necessary business, and still enjoy the freedom of the road.
What’s your current internet setup, and what challenges are you facing? The RV community learns best by sharing real experiences, and there’s always something new to discover about staying connected on the road.